How to Photograph Autumn Colors in a Deciduous Forest
Photographing autumn colors in a deciduous forest offers a unique opportunity to capture the seasonal transformation of temperate woodlands. The interplay of light with red, orange, and yellow leaves creates scenes that many photographers find compelling. To approach this subject effectively, it helps to understand how environmental factors, technical choices, and compositional strategies interact. This article explores several elements that can contribute to successful autumn forest photography.
Deciduous forests are characterized by trees that shed their leaves annually. During autumn, the chlorophyll in leaves breaks down, revealing underlying pigments such as carotenoids and anthocyanins. The resulting colors vary depending on tree species, soil conditions, and weather patterns. For photographers, this means that the same location can present different visual possibilities from one year to the next. Recognizing these variables is part of the process of planning and executing a shoot.
The following sections cover key areas that photographers often consider when capturing fall foliage. These include light conditions, composition, camera settings, timing, and post‑processing. Each area offers a range of approaches rather than a single correct method.
Understanding Light Conditions
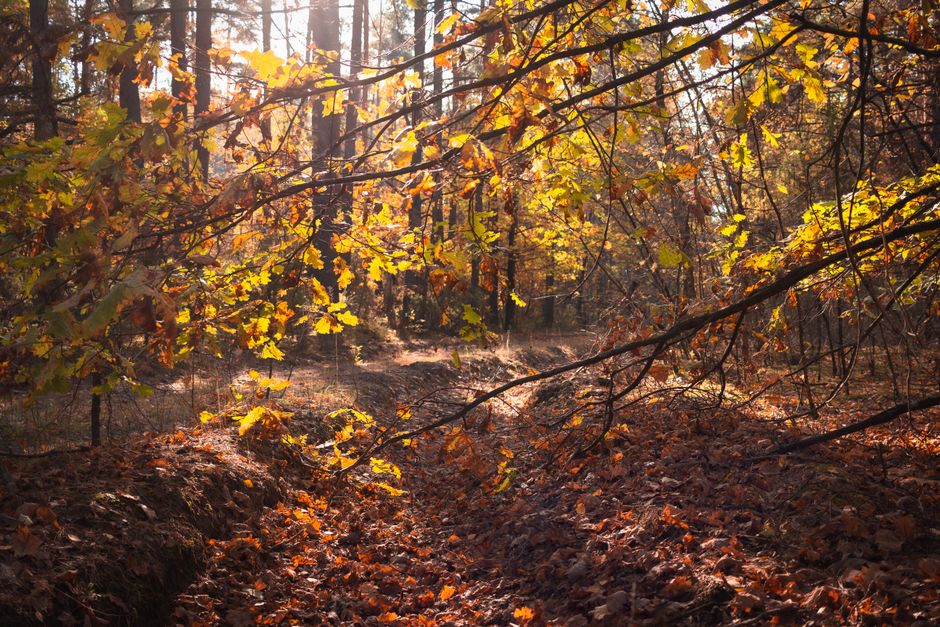
Light quality fundamentally influences how autumn colors appear in a photograph. Golden hour light, which occurs shortly after sunrise and before sunset, tends to produce warm tones that complement the reds and oranges of foliage. During these periods, low‑angle sunlight penetrates the forest canopy more deeply, illuminating leaves from behind and creating a glowing effect. Many photographers find that backlit leaves exhibit higher color saturation and greater detail in their vein structure.
Overcast skies can also be favorable for photographing fall colors. Diffused light reduces harsh shadows and minimizes contrast extremes, allowing the subtleties of leaf hues to emerge more evenly. In dense deciduous forests, direct sunlight often creates patches of high contrast that may cause exposure difficulties. Cloudy conditions help maintain consistent brightness across the scene, which can simplify metering and reduce the need for multiple exposures.
It is also worth considering the direction of light relative to the subject. Side‑lighting can emphasize texture in tree bark and leaf surfaces, while front‑lighting often produces flat images with less depth. Backlighting, as noted, can enhance the translucency of leaves. Each lighting situation presents different opportunities, and adjusting one’s position in relation to the sun can change the mood and visual impact of the image.
Composition Techniques for Forest Scenes
Composing a photograph within a dense forest requires attention to elements that guide the viewer’s eye. Leading lines, such as paths, streams, or fallen logs, can draw attention toward a focal point like a brightly colored tree or a clearing. Curving lines often feel more natural than straight ones, as they mimic the organic shapes found in woodland environments.
Framing is another technique that can isolate and emphasize autumn colors. Overhanging branches, gaps between trunks, or foreground leaves can create a natural frame around a distant subject. This approach adds depth and context, helping to situate the viewer within the forest. The use of foreground elements, such as fallen leaves or mossy rocks, can introduce texture and a sense of scale.
Color contrast plays a role in making autumn foliage stand out. Complementary colors like red and green, or orange and blue, produce visual tension when placed near each other. In a deciduous forest, patches of evergreen trees or a clear sky can provide a contrasting backdrop. Alternatively, a monochromatic composition that focuses solely on warm tones can create a cohesive and harmonious feel. Both approaches are valid and depend on the photographer’s intention for the image.
Camera Settings and Equipment Considerations
Choosing appropriate camera settings for autumn forest photography often involves balancing depth of field, shutter speed, and sensitivity. Aperture settings around f/8 to f/11 are commonly used to ensure that both foreground and background details remain reasonably sharp when working with a wide‑angle lens. For isolating a single leaf or branch, a larger aperture such as f/2.8 or f/4 can produce a shallow depth of field that separates the subject from its surroundings.
Shutter speed selection depends on whether the scene includes moving elements. Wind‑blown leaves or flowing water may require faster speeds, typically 1/250 second or higher, to freeze motion. For static scenes, slower shutter speeds allow the use of lower ISO values, which can reduce noise and preserve fine detail. A tripod provides stability during longer exposures and helps maintain consistent framing across multiple shots.
Polarizing filters are often used in forest photography to reduce glare from wet leaves and enhance color saturation. By rotating the filter, a photographer can control the amount of polarized light reaching the sensor. This can deepen blue skies and make autumn reds appear richer. However, the effect varies with the angle of the sun, and overuse may produce unnatural darkening in parts of the sky. Lens hoods are also useful in forests where stray light from the sides may cause flare.
Timing and Location for Peak Foliage
The timing of autumn color peaks varies by region, elevation, and tree species. In temperate deciduous forests of the United States, peak foliage often occurs between late September and mid‑October, but local conditions can shift this window. Monitoring online foliage reports or consulting with local nature centers can provide current information about color progression. Visiting a location multiple times during the season allows a photographer to observe how colors develop and change.
Weather patterns in the weeks leading up to the shoot can influence both the intensity and duration of autumn colors. A period of warm, sunny days followed by cool nights tends to promote vibrant pigmentation. Conversely, heavy rain or wind can strip leaves prematurely, shortening the window for photography. Early morning fog or mist can add an atmospheric layer to forest scenes, softening distant foliage and creating a sense of depth.
Scouting a location beforehand helps identify promising compositions. It is advisable to note which trees are most colorful, where light enters the forest at different times of day, and how the terrain affects available viewpoints. Some deciduous forests have trails that offer elevated perspectives or openings in the canopy that allow more light to reach the forest floor. Being familiar with a site reduces the time spent searching and increases the likelihood of capturing the desired conditions.
Post‑Processing Approaches for Foliage Images
Digital post‑processing can refine the colors and tones captured in camera. When working with raw files, adjustments to white balance, exposure, and saturation provide flexibility for rendering autumn hues naturally. Increasing the vibrancy or saturation selectively for red and orange channels may help the colors appear more lifelike, without affecting neutral tones. It is generally advisable to avoid over‑saturating, as this can result in unnatural looking foliage.
Contrast and clarity adjustments can bring out texture in leaves and bark. Applying a slight increase in contrast to the midtones often reveals detail lost in flat light. Local adjustments, such as graduated filters or radial masks, allow a photographer to lighten or darken specific areas without altering the entire image. For example, brightening a shadowed area around a colorful tree can improve balance.
Some photographers choose to convert autumn images to black and white, emphasizing tonal range and form over color. This approach can be effective when the composition relies on patterns, lines, or textures rather than vibrant hues. The decision to edit in color or monochrome depends on the intended mood and the strengths of the original capture. Regardless of the method, careful post‑processing respects the initial exposure and avoids creating an artificial appearance.